Carving an FFXI Pumpkin
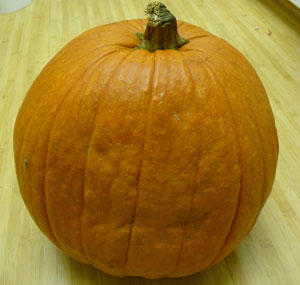 | The Pumpkin Obviously the first step will be to acquire a pumpkin, preferably one that has a nice surface for you to carve your image on. Be sure to stand it up in the store to see how it leans so that you can be sure that the side of the pumpkin you like doesn't tilt at an odd angle. Do not buy your pumpkin while intending to carve it several days later as pumpkins can rot very quickly. Keep size in mind when you choose your pumpkin. If you require lots of carving space a large pumpkin will probably fit your design. However, if your design can be downsized or doesn't require a lot of surface area, then buying a large pumpkin is probably not neccessary. Once you've got your pumpkin, print out your design/picture at the appropriate size to fit your pumpkin. |
 | The Tools Pumpkin carving tools, while technically not required, make carving an elaborate design much easier. This is a set of tools from Pumpkin Masters and came with a book of designs and sold for $5. The crayon is to assist you in cutting out the pumpkin cover. The poker and spiked tool are both used to poke guide-holes of your design. There are two saws, one large and one small, for various carving tasks. The long, curved tool is for scraping out the skin and parts of the pumpkin that require grooves or other detail work. The large scooper is used to scrape out the insides of the pumpkin. |
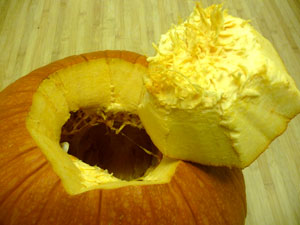 | The Cover Using the crayon, draw a pentagon or octagon shape around the stem of the pumpkin. Take the large saw and insert it into the pumpkin at a 45 degree angle. Do not cut straight down into the pumpkin as this will cause the cover to fall straight down into the pumpkin after you've scraped the insides out. Once you've made the cut around the stem, grab hold of the stem and pull the cover open. If you have difficulty, you may need to go back with the saw and find the areas of the cover that you did not saw the first time around. Remember to cut the cover at an angle! As you can see in the picture, this pumpkin is extremely thick. This indicates a great amount of arm exercise will soon be required. |
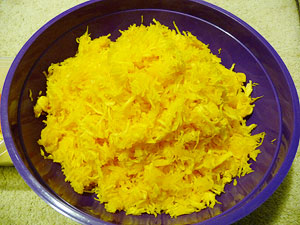 | Scraping No matter what size your pumpkin, you will need to make the walls "thinner" to ensure easier carving. Remove the seeds and "guts" with your hands. You can optionally roast the seeds for eating later. Using the scraper tool, scrape the sides of the pumpkin evenly all around the pumpkin to remove the last of the stringy parts. After this initial first scraping, you'll then need to thin down the walls of the pumpkin's harder flesh. The sides will come off in little strips and you'll need to remove the scrapings once in a while to clear things out. Depending on the size of your pumpkin, this can take a good amount of time and is a good chance to work on your arm strength. |
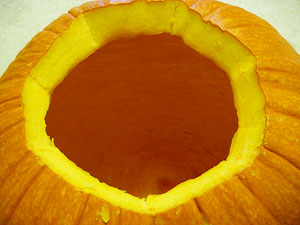 | Scraping Complete 1/2 an inch is a pretty good thickness to work with, unless you have a gigantic pumpkin and end up giving up like how this carver did. The inside of the pumpkin should be smooth all around inside, thus insuring a nice snug home for your candle. |
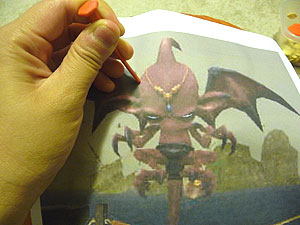 | Tracing the Image Take your FFXI design and tape it onto your carving surface area. If your pumpkin curves, cut slits or fold the paper so that it curves with the pumpkin. Tape it securely all around to ensure the design does not come loose while you are tracing the design into the pumpkin. Using the poker tool, poke holes through the paper and into the pumpkin. If you are doing fine detail tracing, it's best to use the single poker tool. If you are doing long lines or curves, the spiked poker is much quicker. Simply turn it like a wheel to trace several holes at once. Make sure you trace everything that you need to carve your design as once you remove the paper, it is very difficult to put it back in place to trace a part that you missed. |
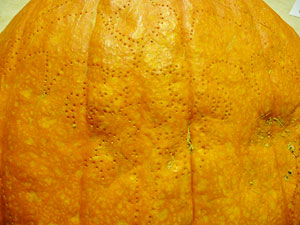 | Carving Once you are done tracing, remove the paper. You should have your design traced into your pumpkin and now will simply have to connect the dots in the appropriate places. Photos of the actual carving are absent due to the carver watching TV while doing this... Using the large and small saws, cut the design out following the dots you traced. 3D details can be achieved by scraping the skin out and thinning out the wall from the outside to create darker glowing areas than the carved out areas. When sawing out large portions of the pumpkin, be sure to remove these sections in small pieces in order to avoid damaging your design. You may need to do additional "wall trimming" when cutting out larger sections of the pumpkin in order to achieve the right look when the pumpkin is lit. Simply use the saw to trim out the parts of the wall that block out the light. Be very careful in the fine detail areas as you can easily tear the design from the sides. |
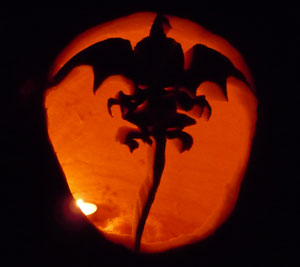 | Photographing the Pumpkin Once you're done carving, you've got your FFXI pumpkin! Add a candle or pumpkin light to your pumpkin. Turn out the lights and take the picture with no flash. Be sure to keep your camera steady as movement will cause extreme blurring of the light shining through. Lighting the pumpkin is a good time to notice any areas for improvement in your design. Make any needed adjustments. If you are using a pumpkin, you will need to cut a smoke hole in the cover. Let your candle burn where it will be placed and check the cover periodically until it has turned black. Cut a smoke hole where the black area is to let the heat from the candle escape from the pumpkin. |
|
Category: Final Fantasy XI
This page last modified 2008-10-28 14:55:45.
© 2024 Fanbyte LLC
